The Building...
Welcome back! The story so far…
A decision to build an equipment storage shed at our
woodland site in Wiltshire very quickly morphed into a quest to build a long
term shelter using minimal tools (mainly what we might carry as part of our
standard kit) and maximum knowledge of the building resources growing naturally
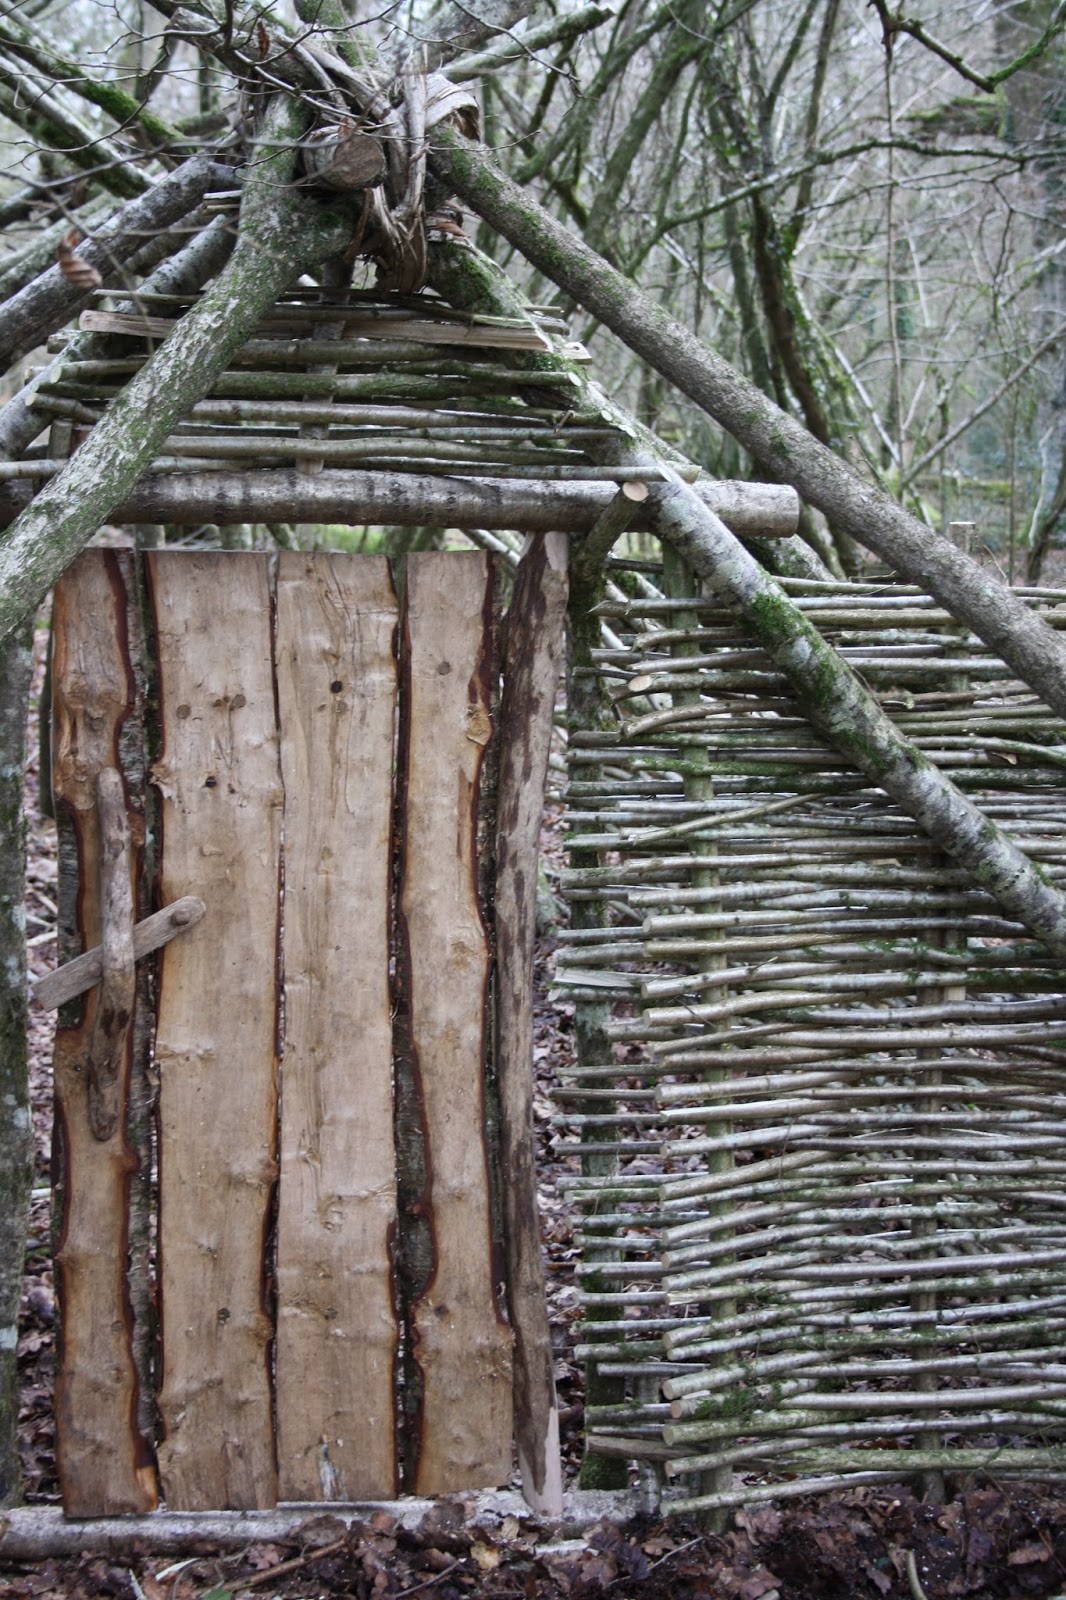
in the woods. A proper hinged, plank door, a la quaint hobbit cottage became
the first construction challenge but proved to be a superb exercise in what can
be achieved with only natural materials and a fair slice of ‘know how’.Shelter building, be it small survival bivouac or palatial log cabin, always requires a sound plan before the work starts and that’s exactly where we were at on a chilly, wintery morning among the bare, hazel coppice and towering, skeletal oak trees. Resisting the urge to be too ambitious by embarking on a full Celtic roundhouse or Anglo Saxon long house we settled on a small, rectangular floor plan with the doorway at one end, just big enough for one hypothetical person to live in comfortably through the winter months. This would mean allowing enough room to fit a raised bed, make a fire place and still have enough room inside to work, cook and store kit in bad weather. The roof would be a simple double pitched affair continuing around the back of the house in an arc at roughly the same pitch (around 50 degrees). The initial planning brain storm also bought to light several problems that typically reduce the effectiveness and life expectancy of survival shelters. We were determined to provide our own answers to these problems but ultimately, only time will tell if our efforts have worked.
Firstly, we wanted the house to be able to ‘breathe’. Our
plan was to make a fully enclosed shelter that would be capable of keeping out
the worst weather but in doing so, we were all too aware that such an enclosed
design could also keep moisture in, especially as the house wouldn’t really be
inhabited and therefore wouldn’t have a constant heat source chugging away.
With a cold, damp atmosphere inside, our shelter structure would rot and
collapse very quickly. Even with our hypothetical inhabitant keeping the home
fires burning day and night creating a dry atmosphere in side, the point where
the thatched roof met the ground would always be damp and if the strength and
integrity of our structure depended entirely on the rafters (as many survival
shelters do) then it stood to reason that it’s life span could only ever last
as long as it takes a constantly sopping hazel rafter, half buried in earth and
leaves to rot through. Probably not very long!

The shelter footprint - level ground with building materials on hand, no dangerous trees overhead but some natural shelter from the surrounding hazel coppice
The solution came in several parts. We would first build a
strong, internal low wall of hazel rods woven around several oak posts on which
many of the rafters would rest (therefore, never being in contact with the damp
ground). This woven, rectangular frame
would provide a sturdy base to start building from, but it would have to be
pretty solid! The secret to the wall’s strength lay in a handful of quartered
‘bone oak’ posts, split from a large log using a small axe and the maul and
hazel wedges made on site. Bone oak, having gone through a chemical change as
it seasons, is absolutely rock hard and virtually rot proof when compared to
the other timber in our woods. These long posts would be carved to a point and
hammered several feet into the earth to form the corner posts and a couple of
intermediate posts to weave between. This seemed like a fantastic idea but by
the end of a very long day of splitting, hammering, shouting and swearing, we wished
we hadn’t thought of it. After the bone oak
splitting saga we decided that any other posts needing to be sunk into the
ground, should be made from readily available and easily workable hazel. The
below ground parts would be charred in the fire first to help preserve them.

Splitting bony oak to make the main posts

Cutting simple joints for the wall plate

Charring the ends of any hazel posts due to be driven into the ground

Weaving walls from hazel rods

The main rafters in place, bound with hazel witheys

The door frame is fitted to the structure and birch plank door is hung and swinging
A ‘wall plate’ (wooden platform on which the roof rafters
sit) was fitted to the top of our woven walls by way of some simple but nifty
joints to minimize any movement and wherever two timbers lay against or crossed
over one another, they were lashed securely in place with hazel withies. Our
rafters were selected so as to have a ‘Y’ fork that, when turned upside down
could hook over the wall plate and hold the rafter in position. For added
stability, every few feet a rafter extended down and into the ground (charred
first of course). Where the rafters
crossed over the ridge pole at the apex, a twin band of flexible hazel rods
wove in and out between them to hold them securely in position. The little
woodland house was beginning to take shape!

Rafters fitted, held in place with their own natural 'birds mouth' forked ends and a twin band of hazel along the ridge

Hazel wattle continues up and over the door frame, tying everything in nice and tight
Our building plan had highlighted the need for the shelter to be kept fairly small and therefore easy to heat with a small open fire inside. Previous research had shown that similar ancient dwellings were often built without chimneys, instead allowing the central fire to form a ‘smoke ceiling’ above head height which would slowly permeate through the roof thatch. This helped preserve the roof timbers and kill off any resident bugs overhead. However, these structures were built to house an entire family and therefore, much larger with higher roofs. Our humble woodland bedsit would be more like a lung bursting smokehouse if we followed the same principle so we came up with the idea of a ‘dormer window’ style opening near the top of the roof on the opposing side to the prevailing wind. With our shelter design being so completely enclosed, this opening would also let in some light. The combined window and chimney idea became affectionately known as the ‘wimney’.

The wimney frame work woven and bound in place

Wimney opening with thatch border and roof nearly ready for thatch

Brash wood matrix applied ready for the thatch and giant thatch retaining sausage fixed in position

Back view of the shelter with thatch retainer shown leaving a suitable gap under the eaves
Usually, when using forest floor debris to thatch a shelter the huge volume of materials is gradually piled against the shelter from ground level upwards. In order to achieve our ventilation gap between roof and ground we would need to prevent the leaf mulch and jumbled medley of materials from just slipping right off the ends of the rafters and so the ‘giant thatch retaining sausage’ was born. A big, long bundle of twiggy brash wood, lashed to the end of each rafter about a foot up from the ground, forming a continuous buffer line running around the lowest point of the shelter roof and sweeping up and over the porch (yes, we built a porch too!). The thatching materials would sit against this buffer creating the desired depth of a foot but still leaving our all-important ventilation gap. Where required, horizontal hazel poles lay against the rafters to provide a sound base, followed by a good layer of spiky brash wood to close up any gaps and give a good ‘sticky’ surface (excuse the pun, but it is rather good…) for the leaf mulch layer to adhere to.

Leaf thatch being applied

Wimney opening still visible in the thick layer of thatch

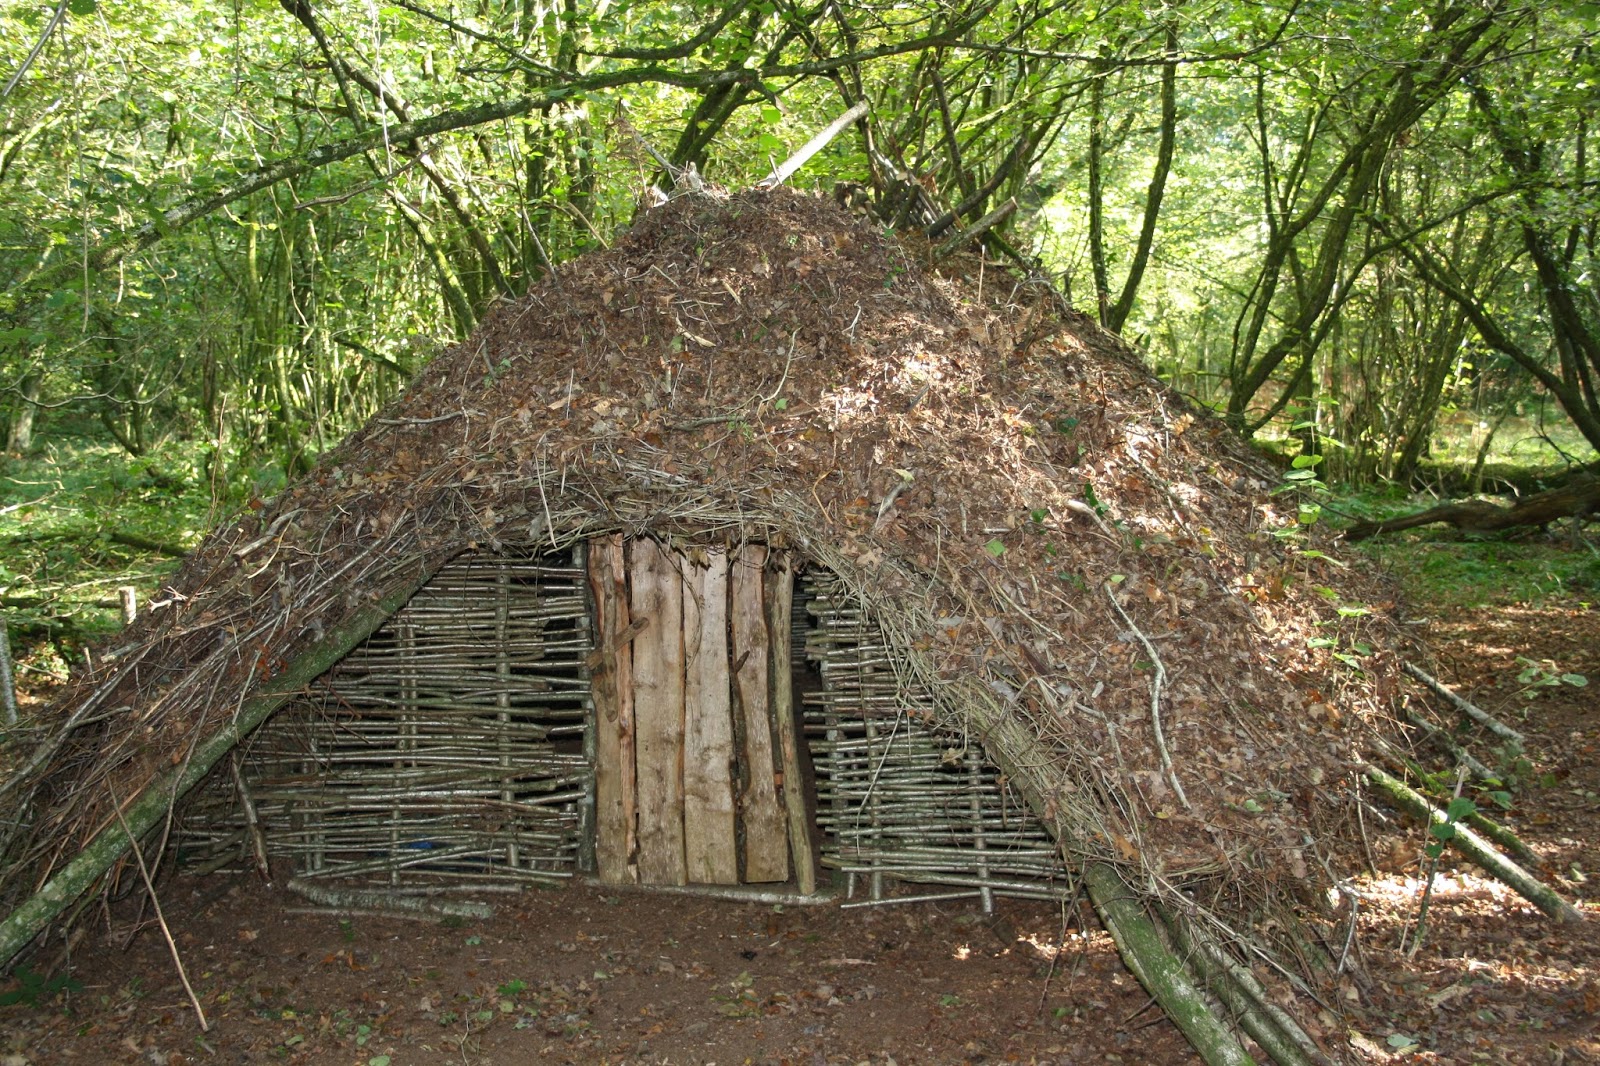
Shelter roof with a good covering of leaf thatch for the summer
The giant thatch retaining sausage (GTRS for short) did a great job of keeping the first insulating layer of leaves exactly where we wanted them and before long our little hut in the woods began to blend in beautifully with it’s surroundings. Just down the track we were fortunate to have a huge swathe of tall, mature bracken. We made the most of this seasonal resource by taking just enough to give a good coverage to our roof, leaving the rest for the ticks. When harvesting bracken it’s important to cut the stems rather than pull at them. For starters, the roots aren’t usually that deep and if the plant is removed roots and all, there’ll be no bracken for the following year. Also, the stems have a sharp ridge that will give you the mother of all paper cuts as you tug them up. Instead, gather together a good bunch and using a long bladed knife, carefully slice through the stems with a sloping angle at ground level. The resulting long, pointed stems we found to be ideal for poking through the leaf mulch and the brash wood thatch layers before folding the bushier fronds over to lay against the roof. By starting at the bottom of the roof and working upwards towards the ridge, each course of fronds overlaid the previous for maximum rain shedding, with the added bonus of ‘pinning’ the mulch and brash layers together like a thatching spar.

Late summer and the bracken layer is added increasing the volume of the roof thatch

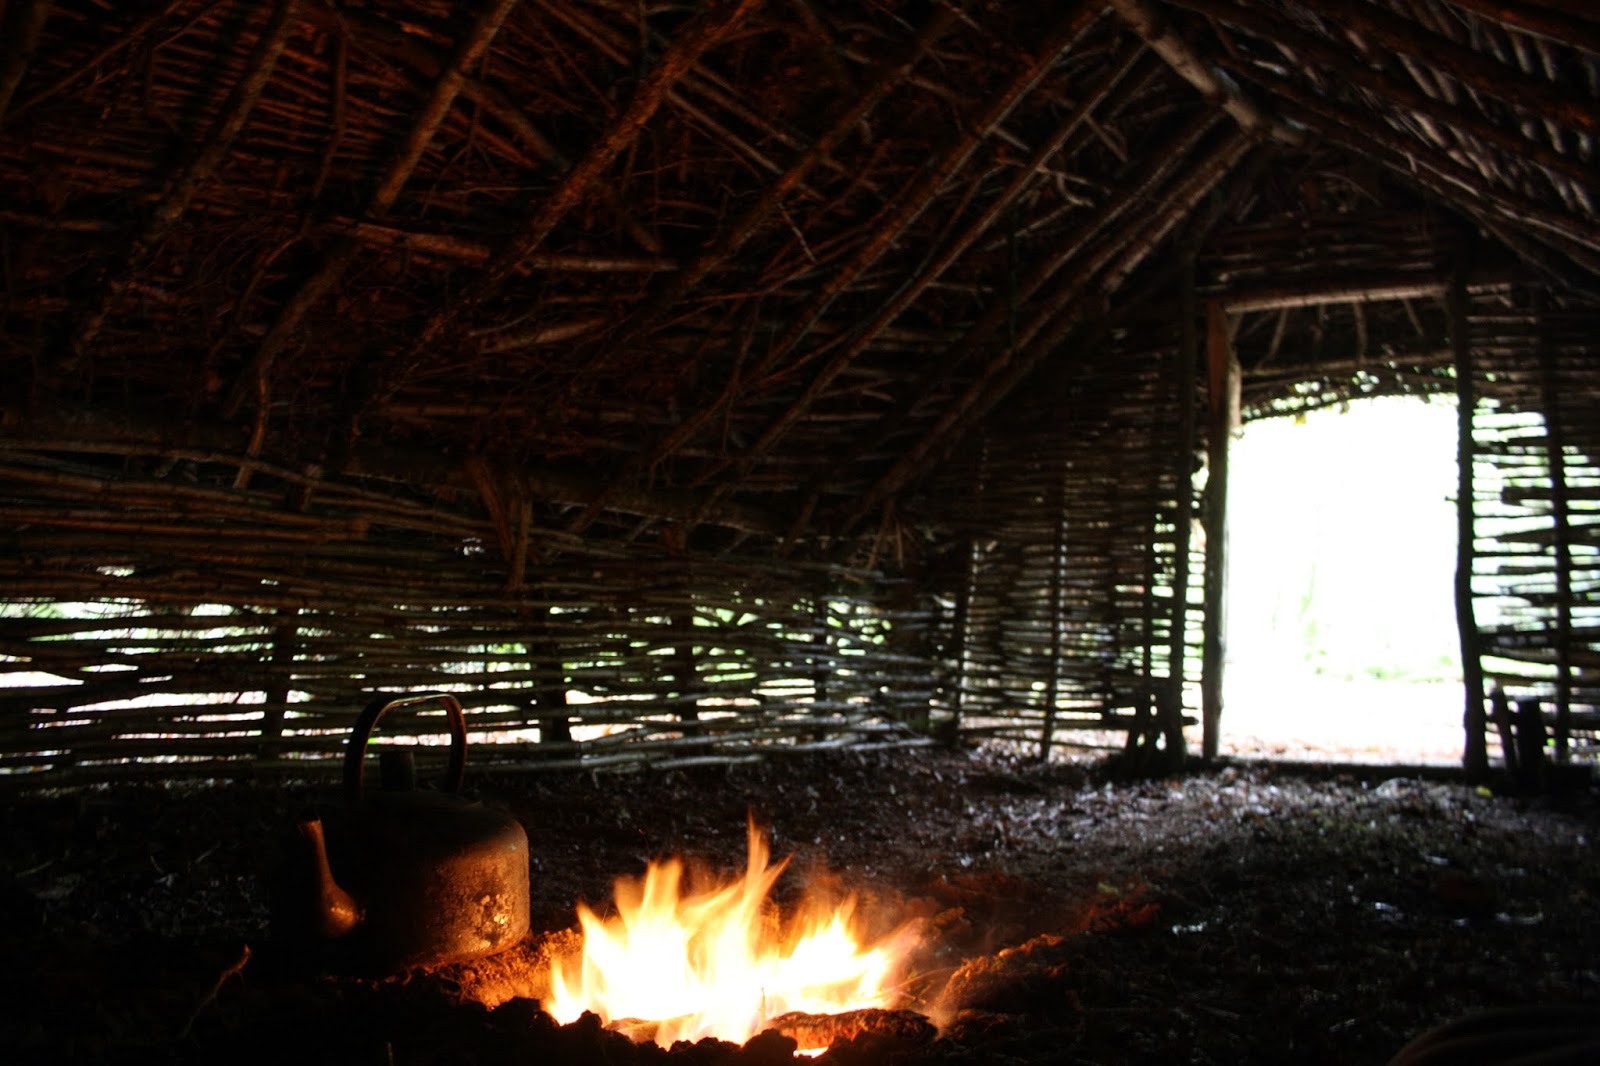
A small fire is lit inside to dry the shelter out and drive away any insects (and to get the kettle on...obviously)
I always judge the strength of a shelter by whether it’ll
take the weight of a fully grown man standing on the roof. To position the top
few courses of bracken thatch this is exactly what it had to support and I’m
very relieved to say that despite me owning shares in both Ginster’s and
Cadbury’s, the roof survived intact. As summer gave way to autumn a familiar
resource became available once again. A top layer of newly fallen leaves was
added to the now wilting bracken fronds giving the shelter more weather
protection and also some seasonal camouflage. In preparation for winter I
decided to add some ‘daub’ to the woven hazel walls, something I had seen
demonstrated before in re-constructed Anglo Saxon villages. Firstly, I turned
over a patch of earth outside the shelter, then added water and old bracken
stems to bind the mix. One ingredient was missing but without a horse and no
other method of producing dung (not one I fancied using anyway) mud and bracken
would have to do. Having mixed a fair few buckets of lime mortar and plaster
while renovating my old cottage, I knew consistency would be all important if
the earthy sludge was to stick to the wall. Using the bushcrafters most
important tool (my hands) I squelched and smoothed the daub between the hazel
wattle until the whole façade was covered and any gaps were filled. Despite
being a pretty messy job I found this to be possibly the most gratifying part
of the whole build, similar in some ways to applying and then buffing a final
coat of wax polish on an item of hand built furniture. The concept of taking
such a readily available resource and using it so effectively to weatherproof a
shelter wall really appeals to me and I’m sure it won’t be the last time I
experiment with it as a building material.

Applying a caulk of mud and bracken stems to the hazel wattle walls

Finished front wall and the shelter really begins to look like a weatherproof dwelling

Inside view, looking out. The hinging post and socket can be clearly seen as well as the benefit of having a good porch!
As mentioned earlier in the article, only time will tell
whether our efforts have created a weatherproof and long lasting shelter.
Throughout the build and especially now it’s finished, I’m drawn back to the
woodland house whenever I pass by to see how it’s holding up. During it's first winter the house had to endure high winds and a long period of wet weather followed by heavy snow. I expected to have to carry out some hasty repairs but amazingly every part remained intact and secure. The multi layered thatch performed admirably at keeping out the heavy rain and inside was still dry and cosy. Not bad for an un-inhabited hut made of sticks!
After three winters without being lived in, just the same as pretty much any un-inhabited house it needs repairs. The central ridge bent and eventually broke under the load of thatch and snow. If the house had had permanent residents this problem would've been identified early and rectified. The mud daub cracked as it dried (which is apparently expected and perfectly normal) but weirdly
I relished the opportunity to mix up another muddy concoction and get to work plastering
over the cracks. Of course, the door is still going strong...

Wooden door latch in action. A buckskin loop is pulled from the inside to lift the latch clear of the retaining hook
So..what would I have done differently with hindsight? For starters I would have beefed up those supports. Although the house was only small, a damp, thatched roof plus snow weighs a hell of a lot - even more than me! I may have looked at different roofing materials. Sheets of birch bark covered with turfs might have done the job or with the tools we had, enough time and patience we could have covered the whole thing in split, wood shingle tiles. I would have experimented with digging down a couple of feet to give more head room without such a large structure above ground. Our soil drains extremely well as we're up on a high wooded ridge on flint and chalk so with a good overhanging roof, guttering trenches and a fire inside I don't think damp would've been an issue. With the small size of the structure we could only ever have a small fire for heating for fear of setting the roof alight. After coming up with the 'wimney' design I have since discovered that old thatched dwellings also allowed the smoke to permeate through the thatching (rather than leave a smoke hole chimney) because it created a 'damping' effect - a smoke ceiling above head height which smothered any lively sparks heading up towards the dry, wood tar covered thatch. A smoke hole actually encourages better draw and carries those cheerful bright sparks right on up to the tinder dry thatch. Possibly not the best idea after all! My next attempt might involve the building of a stone and clay fire place and chimney stack...

A home in the woods. Perhaps a glimpse into our past?
Good work! I love to see experimental archaeology at work. Which is really what this is, even if you weren't trying to reproduce a specific dwelling.
ReplyDeleteThanks Nedra!
Deletethis is some really cool stuff, i was wondering if you could make a few videos of it too?
ReplyDeleteUnfortunately it's not looking that good anymore gershon lev! As mentioned at the end of the article, the ridge pole bent and broke so some major repair work now needed. It lasted for three years uninhabited though so not bad..
DeleteGood to read that two parter again Joe. I was wondering what constitutes 'bony oak', is it the cut or size or something like that?
ReplyDeleteStrange - I did reply to you Austin but it's vanished! Bony oak or stag oak is just a term given to naturally seasoned oak still in the round - dropped branches and such. Bony because it's so damn hard and stag because the crooked shapes of the rotting limb look like a stag's antlers.
ReplyDeleteCurious to know your build time. Start to "finish" (they're never really done) how long would you say it took?
ReplyDeleteHi Chris, very difficult to say as we did bits and bobs when we could - sometimes just me, sometimes with some help so almost impossible to put a time frame on it. If I did it again I'd probably allow a week including the door but that would be hard graft on your own
DeleteThe weaving and interwinding was used by early pioneers building permanent log houses. The log house would be built but the inside walls that divided the rooms had branches interwinding. The studs were thicker comparable to a 2 x 4 or 2 x 2, 3 x 3...but all the same and these studs went down into the ground. I am not sure how far down they went. It was possibly fir because they did NOT rot and the log cabin was well over 400 years old. It was burnt down by would be owners that wanted First Nations off an old reserve privately owned. I know...huh? I couldn't see a chimney...but, in wigwams or teepees, there was a hole in the roof. The hole was controlled by long poles to act like a damper. Hides were attached to these poles to guide the smoke upward. You could also try building the same type by searching for sets of 2 trees that match another set of 2 trees that have a space of 3 - 4 inches (but whatever) and fill in the 2 sets of four trees with branches of various sizes until you have reached 4 - 8 feet. Then, you have a solid wall. If one is lucky, you can find several sets and make a four wall square with a door. Then, build your lean to or hut inside these walls or attach a partial roof or full roof. The cracks can be filled in with a mixture of mud and leaves, moss or whatever. Thanks for sharing.
ReplyDeleteCool stuff you have got and you keep update all of us. survival seeds
ReplyDeleteBook.to
ReplyDeleteVery nice article, I enjoyed reading your post, very nice share, I want to twit this to my followers. Thanks!.
ReplyDeleteBushcraft Courses